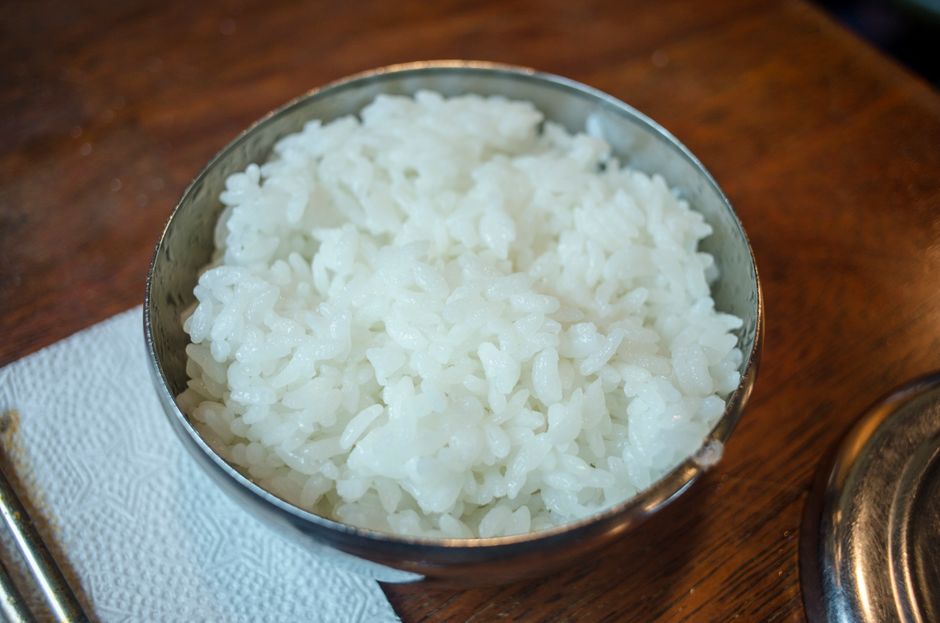
Instant Pot Rice Recipe: Fluffy Perfect Every Time
The ultimate guide to making the perfect instant pot rice recipe at home.
To make perfect instant pot rice, use a 1:1 ratio of rice to water for jasmine or basmati rice, cook on high pressure for 3-4 minutes, then allow a 10-minute natural pressure release before fluffing with a fork. This method delivers consistently fluffy, restaurant-quality rice every single time.
There is nothing more frustrating than ending up with mushy, sticky, or undercooked rice. Whether you are meal prepping for the week, whipping up a quick side dish, or building the foundation for a flavorful bowl, mastering the instant pot rice recipe is a game-changer for any home cook. The Instant Pot takes all the guesswork out of rice cooking by creating a sealed, pressurized environment that steams the grains evenly and consistently.
This comprehensive guide walks you through every detail you need to know — from selecting the right type of rice to understanding water ratios, pressure release methods, and the common mistakes that ruin most batches. By the end of this post, you will have the confidence to produce perfectly fluffy, separate-grain rice every single time, regardless of the variety you choose. Let us dive into the science, the steps, and the secrets behind the best instant pot rice recipe you will ever make.
Pros
- Consistently perfect results with zero guesswork
- Hands-off cooking — set it and forget it
- Works with virtually every variety of rice
- Faster than stovetop methods for most rice types
- Keeps rice warm automatically with the keep-warm function
- Easy to scale up for meal prep or large families
Cons
- Requires an Instant Pot or similar electric pressure cooker
- Natural pressure release adds extra time to the process
- Overfilling the pot can cause sputtering through the valve
- Some trial and error may be needed for your specific model
✅ This recipe was last tested and validated by our test kitchen on 2026-06-11.
Key Takeaways
- Always rinse your rice until the water runs clear to remove excess surface starch
- Use a 1:1 water-to-rice ratio for jasmine and basmati varieties
- Never skip the natural pressure release — it is essential for fluffy grains
- Fluff the rice immediately after cooking to prevent clumping
- Let the rice rest for 5 minutes after fluffing for the best texture
- Adjust water slightly for brown rice, wild rice, or other whole-grain varieties
Ingredients
To make this authentic instant pot rice recipe you will need the following fresh ingredients:
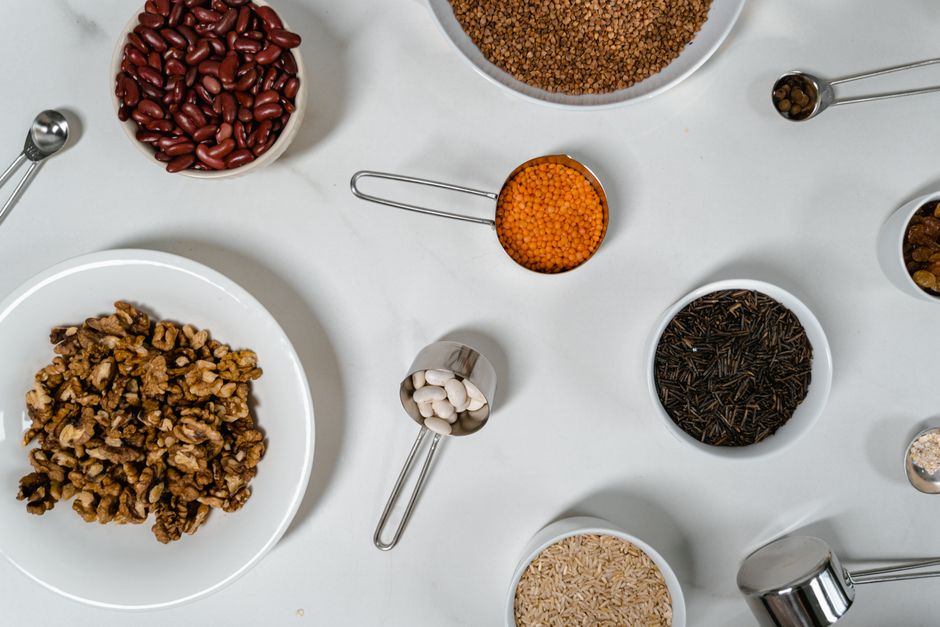
Everything you need for instant pot rice recipe
🛒 Shop Key Ingredients
| Ingredient | Why You Need It | Buy |
|---|---|---|
| Jasmine Rice | Long-grain aromatic rice that cooks up fluffy and fragrant — the ideal choice for this recipe. | Check Price |
| Fine Sea Salt | Enhances the natural flavor of the rice and seasons it evenly throughout. | Check Price |
| Unsalted Butter | Adds richness and a subtle buttery flavor while helping keep grains separate. | Check Price |
Kitchen Equipment
| Tool | Why You Need It | Buy |
|---|---|---|
| Instant Pot (6 or 8 Quart) | The core appliance for this recipe — creates a sealed pressurized environment for perfectly steamed rice. | Check Price |
| Fine-Mesh Strainer | Essential for rinsing rice thoroughly to remove excess starch before cooking. | Check Price |
| Measuring Cups | Accurate measurement of rice and water is critical for the correct texture. | Check Price |
| Fork or Rice Paddle | Used to fluff the rice gently after cooking without crushing the grains. | Check Price |
Step-by-Step Instructions
Follow these steps exactly for perfect instant pot rice recipe every time.
Preparation
Place 2 cups of jasmine rice in a fine-mesh strainer and rinse under cold running water for 60-90 seconds, gently agitating the rice with your fingers. Continue until the water runs mostly clear. This removes excess surface starch that would otherwise make the rice gummy and sticky.
Let the rinsed rice sit in the strainer for 2-3 minutes to drain completely. Excess water clinging to the grains will throw off your water ratio and can result in soggy rice. Shake the strainer gently to remove as much moisture as possible.
Transfer the drained rice to the inner pot of your Instant Pot. Add 2 cups of fresh water, 1 teaspoon of fine sea salt, 1 tablespoon of unsalted butter, and the optional bay leaf. Stir briefly to distribute the salt and butter evenly.
Cooking
Place the lid on the Instant Pot and turn the steam release valve to the “Sealing” position. Select the “Pressure Cook” or “Manual” function and set it to HIGH pressure for 4 minutes. The pot will take approximately 8-10 minutes to come to pressure before the timer begins.
When the cooking cycle completes, do NOT touch the steam release valve. Allow the pressure to release naturally for a full 10 minutes. This is the most critical step — the residual steam continues to gently cook the rice, ensuring even texture throughout. After 10 minutes, carefully turn the valve to “Venting” to release any remaining pressure.
Open the lid and remove the bay leaf. Using a fork or rice paddle, gently fluff the rice by lifting and separating the grains from the bottom up — never stir in circles, as this breaks the grains. Replace the lid and let the rice rest for 5 minutes on the “Keep Warm” setting before serving.
Chef’s Secrets
- The Rinse is Non-Negotiable: Skipping the rinse is the number one reason for gummy instant pot rice. Even “pre-washed” brands benefit from a quick rinse to remove loose starch.
- Soak for Extra Fluffiness: For an even lighter texture, soak your rinsed rice in fresh water for 20-30 minutes before cooking, then drain completely. This allows the grains to absorb moisture evenly before pressure cooking.
- Do Not Peek: Resist the urge to open the lid during the natural pressure release. Every second of trapped steam contributes to the final texture. Opening early releases steam and can leave the rice undercooked in the center.
- Adjust for Altitude: If you live above 3,000 feet, add an extra 2 minutes of cooking time and an extra ¼ cup of water per cup of rice. Lower air pressure at altitude affects how the Instant Pot builds and maintains pressure.
- Use Broth for Flavor: Replace the water entirely with chicken broth, vegetable broth, or coconut milk for a significant flavor upgrade. This simple swap transforms plain rice into a standout side dish.
Storage
Allow the cooked rice to cool completely at room temperature for no more than 1 hour before storing. Transfer it to an airtight container and refrigerate for up to 4-5 days. Spread the rice in a thin layer on a baking sheet for 15-20 minutes before refrigerating — this rapid cooling prevents bacterial growth and keeps the texture from becoming overly dense. Always use clean utensils when scooping from the storage container to maximize shelf life.
Freezing
Instant pot rice freezes exceptionally well, making it perfect for meal prep. Spread the cooled rice in a single layer on a parchment-lined baking sheet and freeze for 1 hour (this flash-freezing step prevents clumping). Then transfer the frozen rice to a freezer-safe zip-lock bag, press out all air, and label with the date. Frozen rice keeps for up to 3 months. Portion the rice into 1-cup servings before freezing so you can thaw only what you need.
Reheating
For the best reheated texture, sprinkle 1-2 teaspoons of water over the rice before microwaving, then cover with a damp paper towel and heat in 30-second intervals, fluffing between each. Alternatively, reheat in a skillet over medium-low heat with a small splash of water or broth, covered with a lid, for 3-4 minutes. The added moisture rehydrates the grains and restores that freshly cooked fluffiness. Avoid reheating rice more than once for food safety reasons.
Variations
- Spicy: Add 1 teaspoon of chili flakes, 2 sliced Thai chilies, and a splash of sriracha to the pot before cooking for a fiery kick that pairs beautifully with Asian-inspired mains.
- Creamy: Replace half the water with full-fat coconut milk and add a pinch of turmeric for golden, rich, and creamy rice that is perfect alongside curries and stews.
- Vegan: Simply swap the butter for extra-virgin olive oil or avocado oil. The result is just as fluffy and delicious with no compromise on texture.
- High-Protein: Stir in 2 beaten eggs during the last minute of cooking (after pressure release) and fluff vigorously — the residual heat scrambles the eggs throughout the rice, adding protein and a silky texture.
Substitutions
This recipe is highly adaptable. For brown jasmine rice, increase the water to 1¼ cups per cup of rice and cook for 22-25 minutes on high pressure with a 10-minute natural release. For basmati rice, use the same 1:1 ratio and 4-minute cook time. Short-grain sushi rice works well with a slightly reduced water ratio of 1:0.9 and a 5-minute cook time. If you do not have butter, any neutral oil or ghee works as a direct substitute. For a lower-sodium version, reduce the salt to ½ teaspoon or omit it entirely.
Common Mistakes
The most common mistake is skipping the rinse, which leads to gummy, clumped rice. Second is using the quick release instead of the natural pressure release — quick releasing causes the rice to seize up and become dense and uneven. Overfilling the pot past the maximum fill line is another frequent error; rice expands significantly during cooking, and overfilling can cause the valve to sputter and create a mess. Finally, stirring the rice with a spoon instead of fluffing with a fork crushes the delicate grains and creates a paste-like consistency.
Serving Suggestions

This instant pot rice recipe is incredibly versatile and serves as the perfect foundation for countless meals. Serve it alongside grilled teriyaki chicken, beef stir-fry, or braised short ribs for a complete dinner. Use it as the base for rice bowls topped with roasted vegetables, a fried egg, and your favorite sauce. It also pairs beautifully with curries, stews, and soups — the fluffy grains soak up sauces without falling apart. For a simple weeknight meal, top the rice with black beans, salsa, avocado, and a squeeze of lime for a quick burrito bowl.
Nutrition Facts
| Nutrient | Per Serving |
|---|---|
| Calories | 206 |
| Protein | 4g |
| Carbohydrates | 45g |
| Fat | 1.5g |
Frequently Asked Questions
Why is my instant pot rice still hard or undercooked?
Can I double this recipe in the Instant Pot?
Do I need to change the water ratio for different types of rice?
How do I prevent rice from sticking to the bottom of the Instant Pot?
Is it safe to leave rice in the Instant Pot on keep warm overnight?
Culinary Glossary
Instant Pot Rice Recipe: Fluffy Perfect Every Time
Ingredients
- 2 cups jasmine rice (or basmati rice)
- 2 cups water
- 1 teaspoon fine sea salt
- 1 tablespoon unsalted butter or olive oil
- 1 bay leaf (optional, for aroma)
Instructions
- Rinse the rice in a fine-mesh strainer under cold water for 60-90 seconds until the water runs mostly clear. Drain thoroughly for 2-3 minutes.
- Transfer the drained rice to the Instant Pot inner pot. Add 2 cups water, 1 teaspoon salt, 1 tablespoon butter, and the optional bay leaf. Stir briefly.
- Secure the lid and set the steam release valve to “Sealing.” Select Pressure Cook/Manual on HIGH for 4 minutes. Allow the pot to come to pressure (8-10 minutes).
- When cooking completes, allow a full 10-minute natural pressure release. Then carefully turn the valve to “Venting” to release remaining pressure.
- Remove the lid and discard the bay leaf. Fluff the rice gently with a fork from the bottom up. Replace the lid and let rest on Keep Warm for 5 minutes before serving.

📅 Last Updated
Updated on 2026-06-11 to reflect the latest test-kitchen insights.
🔍 Testing Methodology
Every recipe is developed and tested at least three times in our home kitchen using standard US measuring cups and spoons.
📖 Recipe Source Notes
Inspired by traditional family methods and refined through professional culinary testing.
⚠️ Nutrition Disclaimer
Nutrition is estimated from an ingredient database. Actual values vary with brands and preparation.