Gluten Free Apple Crisp: Easy, Cozy & Delicious
The ultimate guide to making the perfect gluten free apple crisp at home.
Gluten free apple crisp is a simple baked dessert featuring tender, spiced apples topped with a crunchy oat and almond flour crumble. It requires no special equipment, uses naturally gluten free ingredients, and delivers all the warm, comforting flavor of traditional apple crisp without any gluten.
There is nothing quite like the aroma of cinnamon-spiced apples baking in the oven, especially when topped with a golden, buttery crumble. This gluten free apple crisp recipe proves that dietary restrictions never have to mean sacrificing flavor or texture. By swapping traditional wheat flour for a blend of almond flour and certified gluten free oats, you get a topping that is just as crunchy and satisfying as the original.
Whether you are cooking for someone with celiac disease, gluten sensitivity, or simply looking for a lighter dessert option, this recipe delivers every time. The filling comes together in minutes with fresh apples, warm spices, and a touch of lemon juice to brighten the flavors. The topping requires only a few pantry staples and can be mixed by hand in one bowl. The result is a dessert that is cozy enough for a weeknight treat yet impressive enough to serve at a dinner party.
Pros
- Naturally gluten free with no compromise on taste or texture
- Uses simple, affordable pantry ingredients
- Ready in under one hour from start to finish
- Easily adaptable for vegan and dairy-free diets
- Perfect make-ahead dessert for meal prep and entertaining
- High in fiber from fresh apples and oats
Cons
- Requires certified gluten free oats to be truly safe for celiacs
- Topping can become soggy if stored improperly
- Not suitable for those with nut allergies unless substitutions are made
✅ This recipe was last tested and validated by our test kitchen on 2026-06-26.
Key Takeaways
- Always use certified gluten free rolled oats to avoid cross-contamination
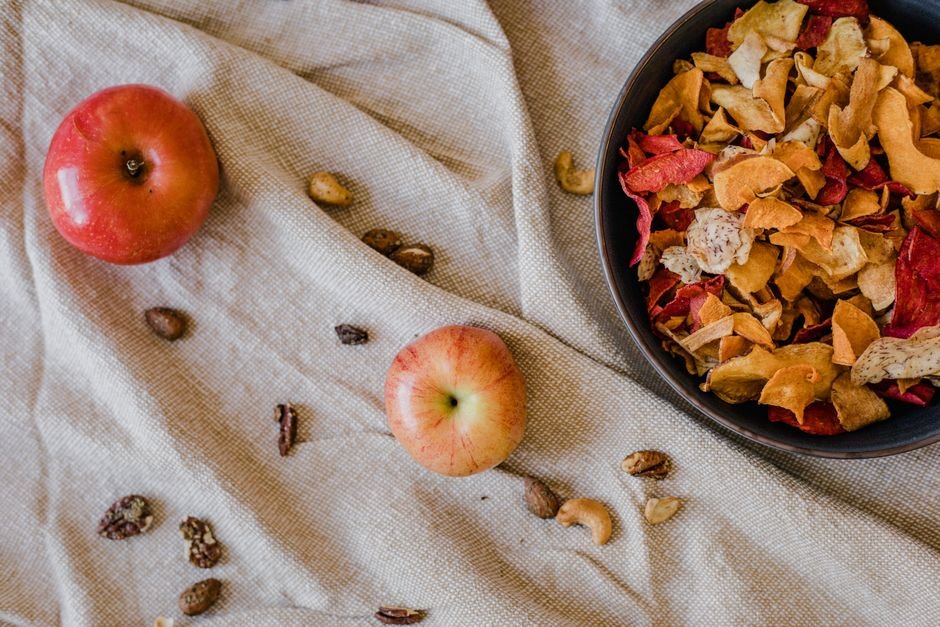
- Choose firm, tart apple varieties like Granny Smith or Honeycrisp for the best texture
- Let the crisp rest for 10 minutes after baking so the filling sets properly
- Cold butter is essential for achieving a flaky, crunchy topping
- Store leftovers in the refrigerator and reheat in the oven to maintain crispness
Ingredients
To make this authentic gluten free apple crisp you will need the following fresh ingredients:

Everything you need for gluten free apple crisp
🛒 Shop Key Ingredients
| Ingredient | Why You Need It | Buy |
|---|---|---|
| Certified Gluten Free Rolled Oats | Provides the signature crunchy topping texture without any gluten contamination | Check Price |
| Almond Flour | Adds richness and helps bind the crumble topping while keeping it gluten free | Check Price |
| Granny Smith Apples | Tart, firm apples that hold their shape during baking and balance the sweetness | Check Price |
Kitchen Equipment
| Tool | Why You Need It | Buy |
|---|---|---|
| 9×9 Inch Baking Dish | The ideal size for even baking and a perfect topping-to-filling ratio | Check Price |
| Mixing Bowls | Needed for separately preparing the apple filling and the crumble topping | Check Price |
| Pastry Cutter | Helps cut cold butter into the dry ingredients for a perfect crumble texture | Check Price |
Step-by-Step Instructions
Follow these steps exactly for perfect gluten free apple crisp every time.
Preparation
Preheat your oven to 350°F (175°C). Lightly grease a 9×9 inch baking dish with butter or cooking spray.
Peel, core, and slice the apples into thin wedges. Place them in a large bowl and toss with lemon juice, granulated sugar, cinnamon, and nutmeg until evenly coated.
In a separate bowl, combine the gluten free oats, almond flour, brown sugar, and salt. Add the cold cubed butter and use a pastry cutter or your fingers to work it into the dry ingredients until the mixture resembles coarse crumbs.
Cooking
Transfer the seasoned apples into the prepared baking dish, spreading them into an even layer. Sprinkle the crumble topping evenly over the apples, covering them completely.
Bake for 35 to 40 minutes, until the topping is golden brown and the apple filling is bubbling around the edges of the dish.
Remove from the oven and let the crisp rest for 10 minutes before serving. This allows the filling to thicken slightly and makes serving easier.
Chef’s Secrets
- Use cold butter: Cold butter creates steam pockets as it bakes, resulting in a lighter, crunchier topping. Warm butter will make the crumble dense and greasy.
- Mix your apple varieties: Combining tart Granny Smith apples with sweeter varieties like Honeycrisp or Fuji creates a more complex, balanced flavor profile.
- Slice apples uniformly: Cutting all apple slices to the same thickness ensures they cook evenly, preventing some pieces from turning mushy while others stay firm.
- Toast the oats first: For an even nuttier flavor, spread the oats on a baking sheet and toast them in the oven for 5 minutes before mixing into the topping.
- Don’t skip the rest time: Letting the crisp sit for 10 minutes after baking allows the juices to thicken, so the filling holds together when scooped.
Storage
Store leftover gluten free apple crisp in an airtight container in the refrigerator for up to 4 days. Make sure the crisp has cooled completely before covering to prevent condensation from making the topping soggy. Keep the container sealed to maintain freshness and prevent the apples from absorbing odors from other foods in the fridge.
Freezing
To freeze, bake the apple crisp as directed and let it cool completely. Wrap the entire baking dish tightly in plastic wrap, then cover with aluminum foil. Freeze for up to 3 months. Alternatively, portion the crisp into individual freezer-safe containers for easy single servings. Thaw overnight in the refrigerator before reheating.
Reheating
For the best texture, reheat leftover apple crisp in a 350°F (175°C) oven for 10 to 15 minutes until warmed through and the topping re-crisps. You can also microwave individual portions for 30 to 60 seconds, though the topping will be softer. If reheating from frozen, add an extra 10 to 15 minutes in the oven without thawing.
Variations
- Spicy: Add 1/4 teaspoon of cayenne pepper and 1/2 teaspoon of ground ginger to the apple filling for a warm, spicy kick that pairs beautifully with the sweet crumble.
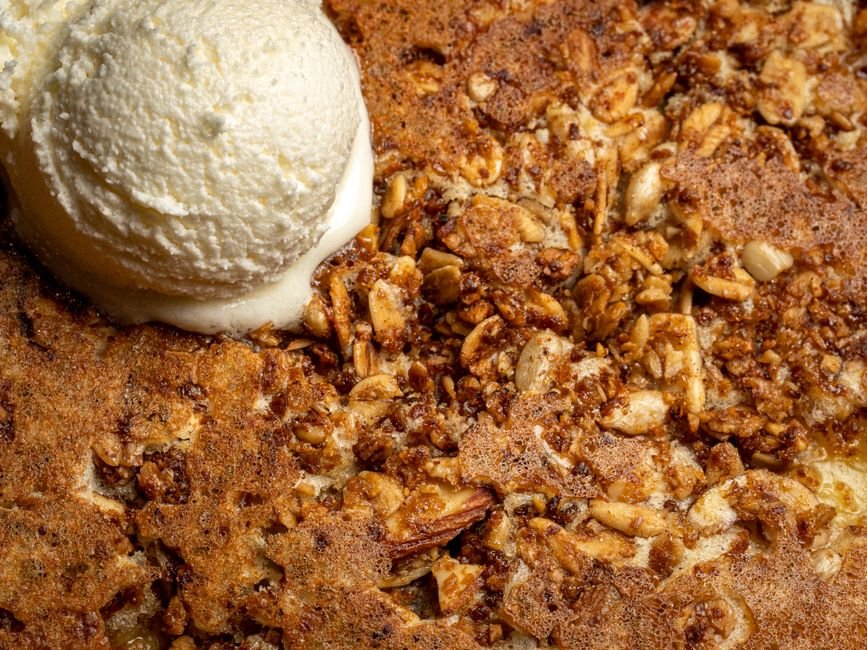
- Creamy: Serve each portion with a scoop of vanilla ice cream, a dollop of whipped cream, or a drizzle of warm custard for an extra indulgent dessert experience.
- Vegan: Replace the butter with coconut oil or a plant-based butter alternative, and ensure your sugar is certified vegan. The recipe works perfectly with these simple swaps.
- High-Protein: Stir 2 tablespoons of vanilla protein powder into the crumble topping and add 1/4 cup of chopped walnuts or pecans for extra protein and crunch.
Substitutions
If you cannot find almond flour, you can substitute it with oat flour or a gluten free all-purpose flour blend in the same quantity. Coconut oil works as a direct replacement for butter in this recipe. For nut-free diets, replace almond flour with sunflower seed flour or additional oat flour. Any firm apple variety will work, though tart apples provide the best contrast to the sweet topping.
Common Mistakes
The most common mistake when making gluten free apple crisp is using regular oats instead of certified gluten free oats, which can be cross-contaminated with wheat during processing. Another frequent error is using warm or melted butter in the topping, which prevents the crumble from achieving its signature crunchy texture. Overfilling the baking dish can also cause the juices to bubble over and create a mess in your oven, so stick to the recommended dish size.
Serving Suggestions
Serve this gluten free apple crisp warm, straight from the oven, with a generous scoop of vanilla ice cream melting over the top. A drizzle of caramel sauce or a sprinkle of toasted pecans adds an elegant touch for dinner parties. For a lighter option, pair it with a dollop of Greek yogurt and a dusting of cinnamon. This dessert pairs beautifully with a cup of hot coffee, chai tea, or a glass of cold milk.
Nutrition Facts
| Nutrient | Per Serving |
|---|---|
| Calories | 380 |
| Protein | 5g |
| Carbohydrates | 58g |
| Fat | 15g |
Frequently Asked Questions
Can I use regular oats instead of gluten free oats?
What are the best apples for gluten free apple crisp?
Can I make this recipe nut-free?
How do I keep the topping crispy when storing leftovers?
Can I prepare this recipe ahead of time?
🍽️ You Might Also Like


Culinary Glossary
Gluten Free Apple Crisp: Easy, Cozy & Delicious
Ingredients
- 6 medium apples, peeled, cored, and sliced
- 1 tablespoon lemon juice
- 1/3 cup granulated sugar
- 1 teaspoon ground cinnamon
- 1/4 teaspoon ground nutmeg
- 1 cup certified gluten free rolled oats
- 1/2 cup almond flour
- 1/2 cup packed brown sugar
- 1/4 teaspoon salt
- 1/3 cup cold unsalted butter, cubed
Instructions
- Preheat oven to 350°F (175°C). Grease a 9×9 inch baking dish.
- Toss sliced apples with lemon juice, granulated sugar, cinnamon, and nutmeg.
- Mix oats, almond flour, brown sugar, and salt. Cut in cold butter until crumbly.
- Spread apples in the dish and sprinkle topping evenly over them.
- Bake for 35 to 40 minutes until golden and bubbling.
- Let rest for 10 minutes before serving.

📅 Last Updated
Updated on 2026-06-26 to reflect the latest test-kitchen insights.
🔍 Testing Methodology
Every recipe is developed and tested at least three times in our home kitchen using standard US measuring cups and spoons.
📖 Recipe Source Notes
Inspired by traditional family methods and refined through professional culinary testing.
⚠️ Nutrition Disclaimer
Nutrition is estimated from an ingredient database. Actual values vary with brands and preparation.