No Bake Oreo Cheesecake
The ultimate guide to making the perfect no bake oreo cheesecake at home.
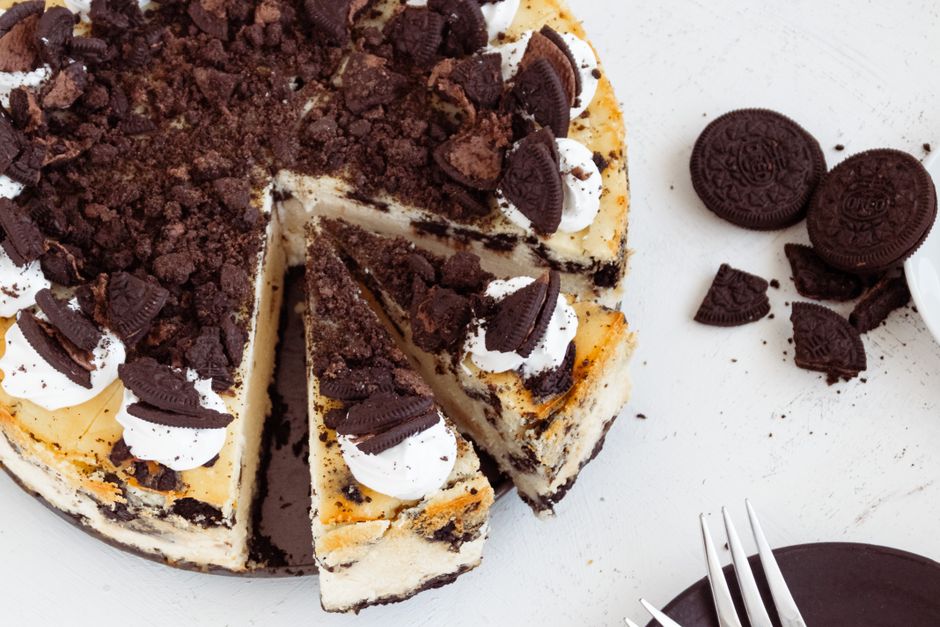
No bake Oreo cheesecake is a rich, creamy dessert made with an Oreo cookie crust and a cream cheese filling loaded with crushed Oreos. It requires zero oven time — just mix, pour, and chill for at least 4 hours before serving.
No bake Oreo cheesecake is one of the most popular desserts for good reason. It combines the irresistible flavor of Oreo cookies with a silky-smooth cream cheese filling, all held together by a buttery cookie crust. Unlike traditional cheesecakes, there is no need to worry about cracking, water baths, or long baking times. This recipe is foolproof and perfect for beginners.
Whether you are preparing a show-stopping dessert for a party, a birthday celebration, or simply craving something sweet on a hot day, this no bake Oreo cheesecake delivers every time. With just a handful of ingredients and minimal effort, you can create a dessert that looks and tastes like it came from a professional bakery. Follow this guide for the best results.
Pros
- No oven required — perfect for hot weather
- Beginner-friendly with simple steps
- Rich, creamy texture with bold Oreo flavor
- Can be made ahead of time for convenience
- Customizable with different toppings and variations
- Sets firmly and slices cleanly when chilled properly
Cons
- Requires several hours of chilling time
- High in calories and sugar
- Needs a springform pan for best results
- Can be too rich for some palates if portions are large
✅ This recipe was last tested and validated by our test kitchen on 2026-06-16.
Key Takeaways
- Use full-fat cream cheese for the creamiest texture and best flavor.
- Crush the Oreos finely for a smooth, compact crust.
- Chill the cheesecake for at least 4 hours — overnight is even better.
- Whip the heavy cream to stiff peaks before folding into the filling.
- Let the cream cheese come to room temperature before mixing to avoid lumps.
- Run a knife around the edge of the pan before releasing the springform.
Ingredients
To make this authentic no bake oreo cheesecake you will need the following fresh ingredients:
Everything you need for no bake oreo cheesecake
🛒 Shop Key Ingredients
| Ingredient | Why You Need It | Buy |
|---|---|---|
| Oreo Cookies | Forms the crust and adds signature chocolate flavor throughout the filling. | Check Price |
| Full-Fat Cream Cheese | Provides the rich, creamy base of the cheesecake filling. | Check Price |
| Heavy Whipping Cream | Whipped to stiff peaks to give the filling its light, airy texture. | Check Price |
| Powdered Sugar | Sweetens the filling smoothly without any graininess. | Check Price |
Kitchen Equipment
| Tool | Why You Need It | Buy |
|---|---|---|
| 9-inch Springform Pan | Allows easy removal of the cheesecake after chilling. | Check Price |
| Food Processor or Rolling Mill | Crushes Oreos into fine crumbs for the crust. | Check Price |
| Electric Mixer | Beats the cream cheese smooth and whips the heavy cream efficiently. | Check Price |
| Rubber Spatula | Folds the whipped cream into the filling gently to keep it airy. | Check Price |
| Measuring Cups and Spoons | Ensures accurate ingredient amounts for consistent results. | Check Price |
Step-by-Step Instructions
Follow these steps exactly for perfect no bake oreo cheesecake every time.
Preparation
Place 24 Oreo cookies (with filling) into a food processor and pulse until you get fine, even crumbs. Alternatively, place them in a zip-lock bag and crush with a rolling pin. You should have about 2 cups of crumbs.
Transfer the Oreo crumbs to a bowl and pour in the melted butter. Stir until every crumb is evenly coated and the mixture looks like wet sand.
Pour the buttery crumbs into a 9-inch springform pan. Use the flat bottom of a measuring cup or glass to press the crumbs firmly and evenly across the bottom and about 1 inch up the sides. Place in the freezer for 10 minutes to set.
In a large bowl, beat the softened cream cheese with an electric mixer on medium speed for 2–3 minutes until completely smooth and fluffy. Scrape down the sides of the bowl as needed.
Add the sifted powdered sugar, vanilla extract, and a pinch of salt to the cream cheese. Beat on low speed until fully combined, then increase to medium and mix for another minute until silky.
In a separate chilled bowl, whip the cold heavy cream with an electric mixer on high speed until stiff peaks form, about 3–4 minutes. Be careful not to over-whip.
Gently fold the whipped cream into the cream cheese mixture using a rubber spatula in slow, sweeping motions. Crush the remaining 4 Oreos into rough chunks and fold them in. Stop as soon as everything is combined — do not over-mix.
Pour the filling over the chilled crust and smooth the top with an offset spatula. Cover tightly with plastic wrap and refrigerate for at least 4 hours, preferably overnight, until fully set.
Cooking
Run a thin knife around the inside edge of the pan. Release the springform clasp and carefully remove the ring. Transfer the cheesecake to a serving plate or board. Top with extra crushed Oreos, whipped cream, or a drizzle of chocolate sauce if desired. Slice and serve cold.
Chef’s Secrets
- Room temperature cream cheese: Take the cream cheese out of the fridge at least 1 hour before starting. Cold cream cheese creates lumps that are nearly impossible to smooth out later.
- Do not skip the powdered sugar: Granulated sugar will make the filling grainy. Powdered sugar dissolves instantly and gives a silky texture.
- Whip the cream cold: Chill your mixing bowl and beaters in the freezer for 10 minutes before whipping. Cold equipment helps the cream reach stiff peaks faster and hold its shape better.
- Freeze the crust first: A 10-minute freeze before adding the filling ensures the crust stays firm and does not crumble when you pour the filling on top.
- Chill overnight for best results: While 4 hours is the minimum, an overnight chill gives the cheesecake a denser, more sliceable texture and deeper flavor.
Storage
Store the no bake Oreo cheesecake in the refrigerator, tightly covered with plastic wrap or in an airtight container. It will stay fresh and delicious for up to 5 days. If you have already sliced it, press plastic wrap gently against the exposed edges to prevent them from drying out. Keep it away from strong-smelling foods in the fridge, as the cream cheese can absorb odors.
Freezing
This cheesecake freezes beautifully for up to 2 months. Place the whole or sliced cheesecake on a baking sheet and freeze uncovered for 2 hours until solid, then wrap tightly in plastic wrap followed by a layer of aluminum foil. Thaw overnight in the refrigerator before serving. The texture remains creamy and smooth after thawing, making this an excellent make-ahead dessert for special occasions.
Reheating
No bake Oreo cheesecake is served cold and should not be reheated. If you prefer a slightly softer texture, let a slice sit at room temperature for 10–15 minutes before serving. This takes the chill off and allows the flavors to come through more fully without melting the filling.
Variations
- Spicy: Add ½ teaspoon of cayenne pepper and a pinch of cinnamon to the crust for a Mexican chocolate-inspired kick that pairs surprisingly well with the creamy filling.
- Creamy: Fold in 4 oz of melted and cooled white chocolate into the cream cheese mixture for an even richer, more decadent filling.
- Vegan: Use vegan cream cheese, coconut cream in place of heavy whipping cream, dairy-free butter, and Oreo cookies (which are naturally vegan) for a plant-based version.
- High-Protein: Replace half the cream cheese with plain Greek yogurt and add 1 scoop of vanilla protein powder to boost the protein content while keeping it creamy.
Substitutions
If you do not have heavy whipping cream, you can use 8 oz of thawed frozen whipped topping (such as Cool Whip) folded into the filling — though the texture will be slightly lighter. For the crust, graham crackers can replace Oreos if you prefer a less chocolatey base. Neufchâtel cheese can substitute for cream cheese at a 1:1 ratio for a slightly lighter version. If you are out of powdered sugar, blend granulated sugar in a blender for 30 seconds until it becomes a fine powder.
Common Mistakes
The most common mistake is not letting the cream cheese soften fully before beating, which results in a lumpy filling. Another frequent error is over-mixing after adding the whipped cream, which deflates the air and makes the cheesecake dense instead of light and fluffy. Using a warm crust is also a problem — always chill it first so it holds together when you add the filling. Finally, trying to unmold the cheesecake before it is fully set will cause it to collapse, so be patient with the chilling time.
Serving Suggestions
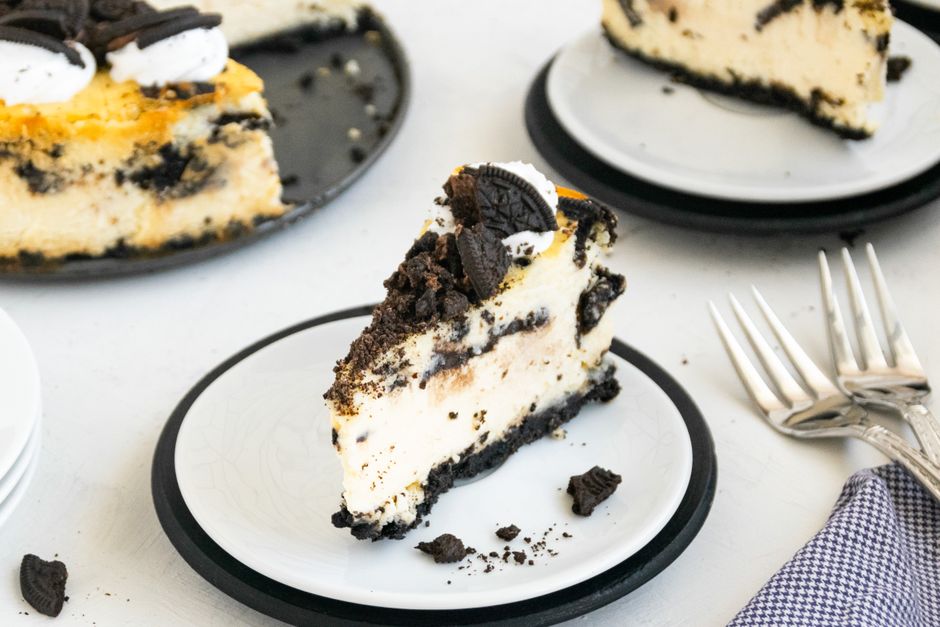
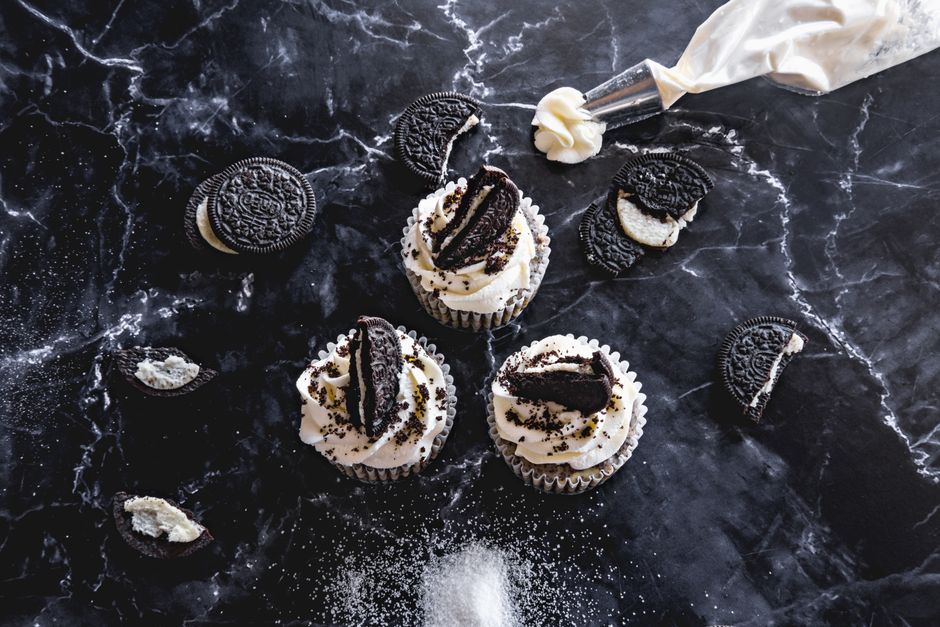
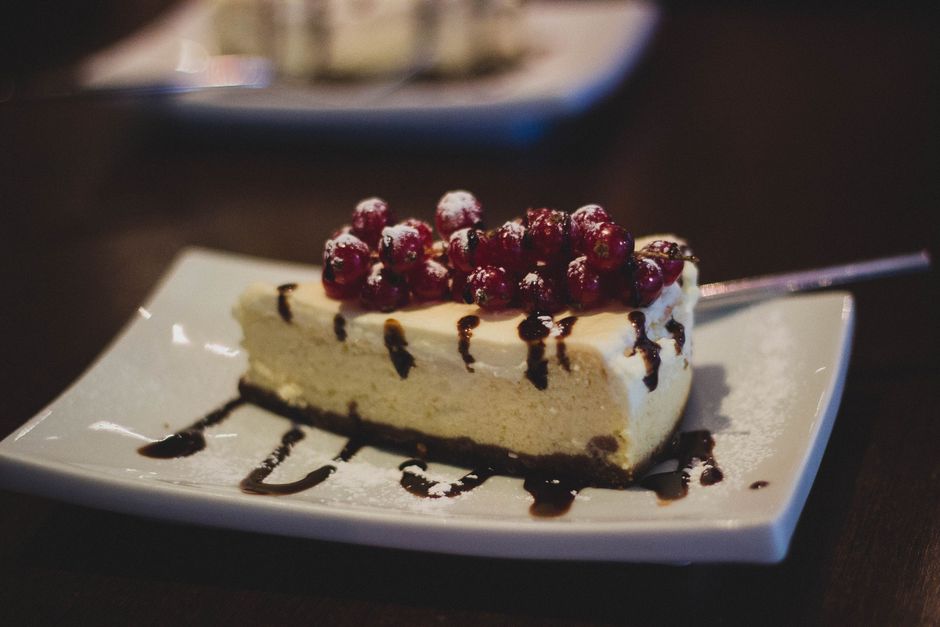
Serve slices of no bake Oreo cheesecake on chilled plates for the best experience. Top each slice with a dollop of whipped cream, a drizzle of hot fudge or caramel sauce, and a sprinkle of crushed Oreo crumbs. For a more elegant presentation, add fresh raspberries or strawberries on the side. This cheesecake pairs wonderfully with a cup of hot coffee, cold milk, or a scoop of vanilla ice cream. It is perfect for birthdays, potlucks, holidays, or any time you need a crowd-pleasing dessert without turning on the oven.
Nutrition Facts
| Nutrient | Per Serving |
|---|---|
| Calories | 480 |
| Protein | 7g |
| Carbohydrates | 42g |
| Fat | 32g |
Frequently Asked Questions
Can I use Cool Whip instead of heavy whipping cream?
How long does no bake Oreo cheesecake last in the fridge?
Can I make this cheesecake without a springform pan?
Why is my no bake cheesecake not setting?
Can I use double-stuffed Oreos for this recipe?
🍽️ You Might Also Like
Culinary Glossary
No Bake Oreo Cheesecake
Ingredients
- 28 Oreo cookies (about 1 full package), divided
- 6 tablespoons unsalted butter, melted
- 16 oz (2 blocks) full-fat cream cheese, softened
- 1 cup powdered sugar, sifted
- 1 teaspoon pure vanilla extract
- 1 cup heavy whipping cream, cold
- Pinch of salt
Instructions
- Crush 24 Oreo cookies into fine crumbs using a food processor or rolling pin.
- Mix the Oreo crumbs with melted butter until evenly coated.
- Press the mixture firmly into the bottom and 1 inch up the sides of a 9-inch springform pan. Freeze for 10 minutes.
- Beat softened cream cheese with an electric mixer until smooth and fluffy, about 2–3 minutes.
- Add powdered sugar, vanilla extract, and salt. Beat until fully combined and silky.
- In a separate bowl, whip cold heavy cream to stiff peaks, about 3–4 minutes.
- Gently fold the whipped cream into the cream cheese mixture. Fold in the remaining 4 crushed Oreos.
- Pour the filling over the chilled crust and smooth the top. Cover and refrigerate for at least 4 hours or overnight.
- Run a knife around the edge, release the springform, and serve cold with desired toppings.

📅 Last Updated
Updated on 2026-06-16 to reflect the latest test-kitchen insights.
🔍 Testing Methodology
Every recipe is developed and tested at least three times in our home kitchen using standard US measuring cups and spoons.
📖 Recipe Source Notes
Inspired by traditional family methods and refined through professional culinary testing.
⚠️ Nutrition Disclaimer
Nutrition is estimated from an ingredient database. Actual values vary with brands and preparation.