Instant Pot Chili Recipe (Ready in 30 Minutes)
The ultimate guide to making the perfect instant pot chili recipe at home.
This instant pot chili recipe delivers a rich, deeply flavorful chili in just 30 minutes of pressure cooking time. Brown your beef, add your aromatics and spices, pour in tomatoes and beans, then pressure cook — the Instant Pot does all the heavy lifting to create fall-apart tender beef and perfectly melded flavors.
There is nothing quite like a steaming bowl of hearty chili on a cold evening, but traditional stovetop chili can demand hours of simmering. This instant pot chili recipe changes everything. By harnessing the power of pressure cooking, you get all the slow-simmered depth of flavor in a fraction of the time. The high-pressure environment forces spices into the meat and melds the tomatoes, beans, and aromatics together in a way that normally takes hours of patient stirring.
Whether you are meal-prepping for a busy week, feeding a hungry game-day crowd, or simply craving a satisfying one-pot dinner, this recipe has you covered. It uses pantry-friendly ingredients, comes together with minimal hands-on work, and produces a chili that tastes like it has been bubbling away all afternoon. Read on for every tip, trick, and variation you need to make it your own.
Pros
- Ready in under 45 minutes from start to finish
- Bold, slow-simmered flavor without the long wait
- Minimal hands-on time — the pressure cooker does the work
- Uses affordable, pantry-staple ingredients
- Easy to scale up for meal prep or a crowd
- Freezes beautifully for up to 3 months
Cons
- Requires an Instant Pot or electric pressure cooker
- Can be tricky to get the right spice level on the first try
- Ground beef must be browned separately for best flavor
- Beans can become overcooked if pressure time is too long
✅ This recipe was last tested and validated by our test kitchen on 2026-06-22.
Key Takeaways
- Always brown the ground beef using the Sauté function before pressure cooking — this builds the flavor foundation.
- Deglaze the pot thoroughly after browning to prevent a Burn error.
- Use fire-roasted diced tomatoes for a deeper, smokier flavor.
- Let the pressure release naturally for 10 minutes before quick-releasing the rest.
- Add a splash of apple cider vinegar at the end to brighten all the flavors.
- Chili tastes even better the next day — plan ahead if you can.
Ingredients
To make this authentic instant pot chili recipe you will need the following fresh ingredients:
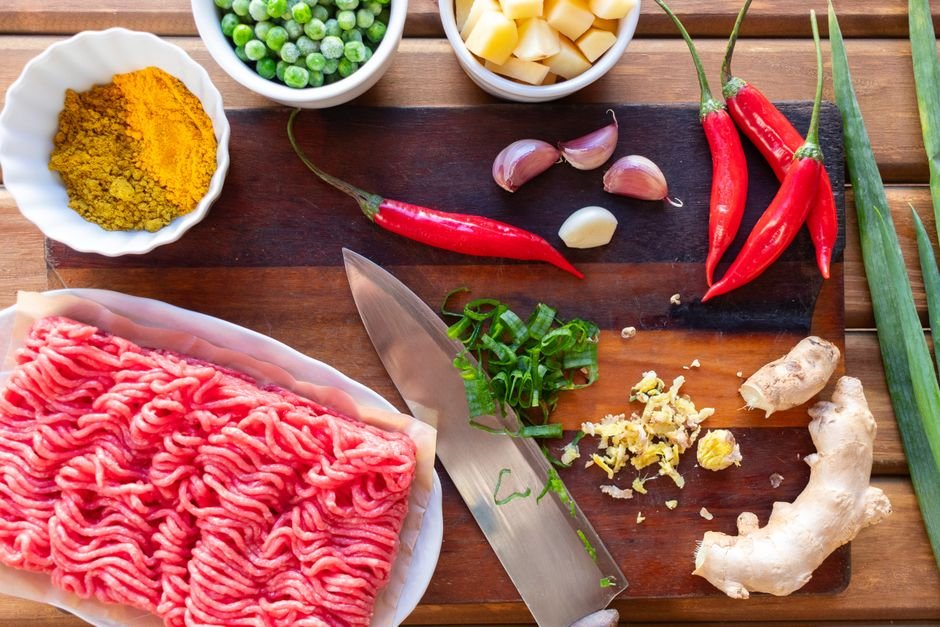
Everything you need for instant pot chili recipe
🛒 Shop Key Ingredients
| Ingredient | Why You Need It | Buy |
|---|---|---|
| Ground beef (80/20) | Provides rich, meaty flavor and stays tender under pressure | Check Price |
| Fire-roasted diced tomatoes | Adds a smoky depth that regular diced tomatoes cannot match | Check Price |
| Chili powder | The backbone spice that gives chili its signature warmth and color | Check Price |
| Ground cumin | Delivers an earthy, slightly nutty flavor essential to authentic chili | Check Price |
| Kidney beans | Classic chili bean with a firm texture that holds up during pressure cooking | Check Price |
| Smoked paprika | Adds a subtle smokiness that enhances the overall depth of the dish | Check Price |
Kitchen Equipment
| Tool | Why You Need It | Buy |
|---|---|---|
| Instant Pot (6-quart) | The pressure cooker that makes this recipe fast and hands-off | Check Price |
| Wooden spoon | Essential for browning meat and deglazing the pot | Check Price |
| Measuring spoons | Accurate spice measurements are critical for balanced flavor | Check Price |
| Ladle | For serving hot chili into bowls | Check Price |
Step-by-Step Instructions
Follow these steps exactly for perfect instant pot chili recipe every time.
Preparation
Dice the onion finely and mince the garlic cloves. Having everything prepped before you start the Sauté function keeps the process smooth and prevents burning.
In a small bowl, combine the chili powder, cumin, smoked paprika, and dried oregano. Pre-mixing ensures even distribution throughout the chili.
Open both cans of beans, drain the liquid, and rinse thoroughly under cold water. This reduces sodium and prevents the chili from becoming too starchy.
Cooking
Select the Sauté function on your Instant Pot and add the olive oil. Once hot, add the ground beef. Break it apart with a wooden spoon and cook until no pink remains, about 5 to 6 minutes. Do not skip this step — browning creates the Maillard reaction that gives the chili its deep, savory flavor.
Add the diced onion to the pot and cook for 3 minutes until softened. Add the minced garlic and tomato paste, stirring constantly for 60 seconds until fragrant. The tomato paste should darken slightly in color.
Sprinkle the pre-mixed spice blend over the beef and onion mixture. Stir well and cook for 30 seconds. Toasting the spices in the fat releases their essential oils and intensifies the flavor dramatically.
Pour in the beef broth and use your wooden spoon to scrape up every bit of browned fond from the bottom of the pot. This step is critical — any stuck-on bits can trigger a Burn warning during pressure cooking.
Pour in the fire-roasted diced tomatoes (with their juices), the tomato sauce, and the drained kidney beans and black beans. Add the bay leaves. Stir everything together gently. Do not add the apple cider vinegar yet — it goes in after cooking.
Secure the lid, set the valve to Sealing, and select Pressure Cook (High) for 15 minutes. The pot will take about 10 minutes to come to pressure. Once the cycle completes, allow a natural pressure release for 10 minutes, then carefully quick-release any remaining pressure.
Remove the bay leaves. Stir in the apple cider vinegar, salt, and black pepper. Taste and adjust seasoning — you may want extra salt, a pinch of sugar to balance acidity, or more chili powder for heat. Let the chili rest for 5 minutes before serving; it will thicken slightly as it cools.
Chef’s Secrets
- Browning is everything: Take the time to get a deep brown color on your ground beef. The dark bits on the bottom of the pot are pure flavor — do not rush this step.
- Deglaze thoroughly: A thin layer of liquid covering the entire bottom of the pot prevents the Burn error. Use broth and scrape every last bit of fond loose.
- Layer your spices: Adding spices before the liquid forces them to bloom in the hot oil, creating a more complex and rounded flavor profile than simply dumping them in with the tomatoes.
- Natural release matters: Letting the pressure release naturally for 10 minutes allows the meat to continue tenderizing and prevents the beans from bursting.
- Acid at the end: Adding apple cider vinegar after cooking brightens the entire dish. Acid added during pressure cooking can toughen beans and dull over time.
- Rest before serving: Chili that sits for even 5 to 10 minutes off heat will thicken and the flavors will meld together more harmoniously.
Storage
Allow the chili to cool completely to room temperature, then transfer it to airtight containers. Store in the refrigerator for up to 5 days. The flavor actually improves overnight as the spices continue to meld, making this an ideal make-ahead meal.
Freezing
This chili freezes exceptionally well. Portion it into freezer-safe containers or heavy-duty zip-top bags, leaving about half an inch of headspace for expansion. Label with the date and freeze for up to 3 months. For best results, thaw overnight in the refrigerator before reheating rather than using a microwave to defreeze.
Reheating
Reheat refrigerated chili in a saucepan over medium-low heat, stirring occasionally, until heated through — about 8 to 10 minutes. Add a splash of beef broth or water if the chili has thickened too much. For frozen chili, thaw overnight first, then reheat using the same stovetop method. You can also reheat individual portions in the microwave in 90-second intervals, stirring between each round.
Variations
- Spicy: Add 1 to 2 diced jalapeños with the onions, stir in 1 teaspoon of cayenne pepper with the spice blend, and finish with a few dashes of your favorite hot sauce. For serious heat, include a minced habanero pepper.
- Creamy: Stir in 4 oz of softened cream cheese and ½ cup of heavy cream after the pressure cycle completes. The residual heat will melt the cream cheese into a velvety, rich broth that is incredibly satisfying.
- Vegan: Replace the ground beef with 2 cups of cooked lentils or a plant-based ground meat substitute. Use vegetable broth instead of beef broth, and double the beans for heartiness. Add 1 tablespoon of soy sauce for umami depth.
- High-Protein: Increase the ground beef to 1.5 lbs, add an extra can of black beans, and stir in ¼ cup of unflavored collagen peptides after cooking for an additional protein boost without altering the flavor.
Substitutions
This recipe is highly adaptable. Swap ground beef for ground turkey or ground chicken for a lighter chili — you may want to add an extra tablespoon of olive oil since leaner meats have less fat. Pinto beans work beautifully in place of kidney beans. If you do not have fire-roasted tomatoes, regular diced tomatoes with ½ teaspoon of smoked paprika added to the spice blend is a fine substitute. Vegetable broth can replace beef broth if needed. For a milder chili, reduce the chili powder to 1 tablespoon and omit the cayenne.
Common Mistakes
The most frequent error is skipping the browning step or not deglazing properly, which leads to a Burn warning and a less flavorful final product. Another common mistake is adding the apple cider vinegar before pressure cooking — the acid can toughen the beans over time and dull the brightness you want at the end. Overfilling the pot beyond the Max Fill line is also risky; chili expands and bubbles under pressure, so never fill past two-thirds capacity. Finally, rushing the natural release by immediately quick-releasing all the pressure can cause the liquid to splatter and may result in tougher meat.
Serving Suggestions

Serve this chili in deep bowls topped with shredded sharp cheddar cheese, a dollop of sour cream, sliced green onions, and fresh cilantro. Classic sides include warm cornbread, saltine crackers, or tortilla chips. For a loaded chili bowl, add diced avocado, pickled jalapeños, and a squeeze of lime juice. This chili also makes an excellent topping for baked potatoes, nachos, or hot dogs.
Nutrition Facts
| Nutrient | Per Serving |
|---|---|
| Calories | 420 |
| Protein | 32g |
| Carbohydrates | 28g |
| Fat | 22g |
Frequently Asked Questions
Can I use frozen ground beef in the Instant Pot?
Why did my Instant Pot show a Burn warning?
Can I double this recipe?
How do I make this chili less spicy?
Can I use dried beans instead of canned?
🍽️ You Might Also Like

Culinary Glossary
Instant Pot Chili Recipe (Ready in 30 Minutes)
Ingredients
- 1 lb ground beef (80/20 lean-to-fat ratio)
- 1 tablespoon olive oil
- 1 large yellow onion, diced
- 4 cloves garlic, minced
- 2 tablespoons tomato paste
- 2 tablespoons chili powder
- 1 tablespoon ground cumin
- 1 teaspoon smoked paprika
- 1 teaspoon dried oregano
- 1 can (15 oz) fire-roasted diced tomatoes
- 1 can (15 oz) tomato sauce
- 1 can (15 oz) kidney beans, drained and rinsed
- 1 can (15 oz) black beans, drained and rinsed
- 1 cup beef broth
- 1 tablespoon apple cider vinegar
- 1 teaspoon salt (adjust to taste)
- ½ teaspoon black pepper
- 2 bay leaves
Instructions
- Dice the onion and mince the garlic. Combine chili powder, cumin, smoked paprika, and oregano in a small bowl. Drain and rinse both cans of beans.
- Select Sauté on the Instant Pot. Add olive oil and ground beef. Brown for 5 to 6 minutes, breaking apart with a wooden spoon until no pink remains.
- Add diced onion and cook 3 minutes. Add garlic and tomato paste, stirring for 60 seconds until fragrant.
- Sprinkle the spice blend over the beef. Stir and cook 30 seconds to toast the spices.
- Pour in beef broth and deglaze the pot, scraping up all browned bits from the bottom.
- Add diced tomatoes, tomato sauce, kidney beans, black beans, and bay leaves. Stir gently.
- Secure lid, set valve to Sealing. Pressure Cook on High for 15 minutes. Allow 10 minutes natural release, then quick-release remaining pressure.
- Remove bay leaves. Stir in apple cider vinegar, salt, and pepper. Adjust seasoning to taste. Let rest 5 minutes before serving.

📅 Last Updated
Updated on 2026-06-22 to reflect the latest test-kitchen insights.
🔍 Testing Methodology
Every recipe is developed and tested at least three times in our home kitchen using standard US measuring cups and spoons.
📖 Recipe Source Notes
Inspired by traditional family methods and refined through professional culinary testing.
⚠️ Nutrition Disclaimer
Nutrition is estimated from an ingredient database. Actual values vary with brands and preparation.