Easy Baked Chicken Breast – Juicy & Perfect Every Time
The ultimate guide to making the perfect easy baked chicken breast at home.
To make easy baked chicken breast that’s juicy every time, brine or marinate the breasts for at least 30 minutes, season generously with salt, pepper, paprika, and garlic powder, then bake at 425°F (220°C) for 18–22 minutes until the internal temperature reaches 165°F (74°C). Let it rest for 5 minutes before slicing to lock in the juices.
Easy baked chicken breast is one of the most reliable and versatile recipes in any home cook’s repertoire. Whether you’re meal prepping for the week, feeding a hungry family, or simply looking for a healthy protein option that doesn’t sacrifice flavor, this recipe delivers every single time. The key to perfect baked chicken breast lies in three simple principles: proper seasoning, the correct oven temperature, and allowing the meat to rest before slicing.
Unlike pan-searing or grilling, baking chicken breast in the oven requires minimal hands-on effort and produces consistently moist results when done correctly. This recipe uses a blend of pantry spices—paprika, garlic powder, onion powder, and dried herbs—to create a golden, flavorful crust while keeping the interior incredibly juicy. You’ll also find chef-approved tips, common mistakes to avoid, and several delicious variations to keep your dinners exciting all week long.
Pros
- Ready in under 30 minutes of active cooking time
- Requires only basic pantry spices and olive oil
- Extremely versatile—pairs with virtually any side dish
- Perfect for meal prep; stores well for up to 4 days
- High in lean protein with minimal fat content
- Beginner-friendly with foolproof results
Cons
- Can dry out easily if overcooked or not brined
- Less caramelization compared to pan-seared chicken
- Requires an instant-read thermometer for best accuracy
✅ This recipe was last tested and validated by our test kitchen on 2026-06-16.
Key Takeaways
- Always bring chicken breasts to room temperature for 15–20 minutes before baking for even cooking.
- Use an instant-read meat thermometer; pull chicken at 160°F (71°C)—it will carry over to 165°F (74°C) while resting.
- A quick 30-minute brine or marinade makes a dramatic difference in juiciness.
- Pat the chicken completely dry before seasoning so the spices adhere properly and the skin browns nicely.
- Let the baked chicken rest for at least 5 minutes before slicing to redistribute the juices.
Ingredients
To make this authentic easy baked chicken breast you will need the following fresh ingredients:
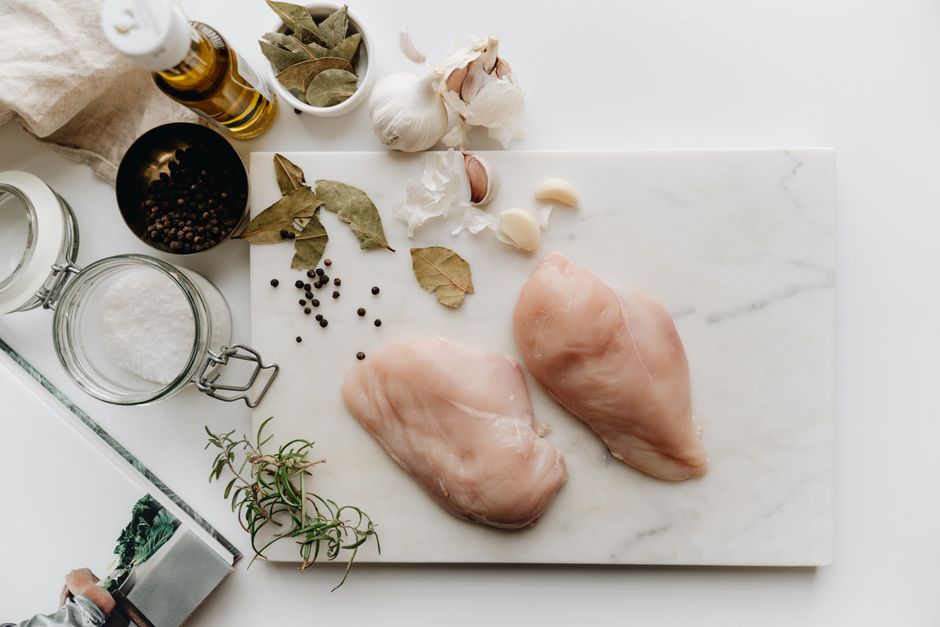
Everything you need for easy baked chicken breast
🛒 Shop Key Ingredients
| Ingredient | Why You Need It | Buy |
|---|---|---|
| Smoked Paprika | Adds a deep, smoky sweetness and vibrant golden-red color to the chicken crust. | Check Price |
| Garlic Powder | Provides a savory, aromatic base flavor that fresh garlic can’t replicate in dry rubs. | Check Price |
| Extra-Virgin Olive Oil | Helps the spices adhere to the chicken and promotes even browning in the oven. | Check Price |
Kitchen Equipment
| Tool | Why You Need It | Buy |
|---|---|---|
| Instant-Read Meat Thermometer | The single most important tool for perfectly cooked chicken—eliminates guesswork and prevents overcooking. | Check Price |
| Rimmed Baking Sheet | Provides a stable, flat surface for even heat distribution and catches any drippings. | Check Price |
| Wire Cooling Rack | Elevates the chicken above the pan for airflow, preventing the bottom from getting soggy. | Check Price |
| Parchment Paper | Makes cleanup effortless and prevents the chicken from sticking to the rack or pan. | Check Price |
Step-by-Step Instructions
Follow these steps exactly for perfect easy baked chicken breast every time.
Preparation
Set your oven to 425°F (220°C). Position a rack in the center of the oven. Line a rimmed baking sheet with parchment paper and place a wire cooling rack on top.
Remove the chicken breasts from the refrigerator and let them sit at room temperature for 15–20 minutes. Pat each breast completely dry with paper towels—this is essential for proper browning.
Place each chicken breast between two sheets of plastic wrap or inside a zip-lock bag. Using a meat mallet or rolling pin, gently pound the thicker end until the breast is an even ¾-inch thickness throughout. This ensures uniform cooking.
Drizzle olive oil over both sides of each breast and rub to coat evenly. In a small bowl, combine the kosher salt, black pepper, smoked paprika, garlic powder, onion powder, dried oregano, and dried thyme. Sprinkle the spice mixture evenly over both sides of each breast, pressing gently to adhere.
Cooking
Place the seasoned chicken breasts on the wire rack, leaving at least 1 inch of space between each piece for proper air circulation. Squeeze fresh lemon juice over the top of each breast.
Bake for 18–22 minutes, depending on the size of the breasts. Insert an instant-read thermometer into the thickest part of the largest breast. Remove the chicken when it reads 160°F (71°C)—it will carry over to the safe 165°F (74°C) while resting.
Transfer the baked chicken breasts to a clean cutting board and tent loosely with aluminum foil. Let them rest for 5–8 minutes. This crucial step allows the juices to redistribute throughout the meat, resulting in a moist, tender bite.
Slice the chicken breasts against the grain on a slight diagonal for the most tender presentation. Garnish with freshly chopped parsley and an extra squeeze of lemon if desired. Serve immediately with your favorite sides.
Chef’s Secrets
- Brine for bulletproof juiciness: Dissolve ¼ cup kosher salt in 4 cups of cold water and submerge the chicken breasts for 30 minutes to 2 hours before cooking. This simple brine changes the protein structure, allowing the meat to retain significantly more moisture during baking.
- Butter under the skin for extra flavor: If you’re using skin-on breasts, slide a thin pat of herb butter between the skin and the meat before baking. The butter bastes the chicken from above as it melts, creating an incredibly flavorful result.
- Don’t skip the resting period: Cutting into chicken immediately after it comes out of the oven releases all the precious juices onto the cutting board. A 5-minute rest can mean the difference between dry and succulent chicken.
- Use the high-heat method: Baking at 425°F (220°C) rather than the traditional 350°F (175°C) creates a better sear on the exterior while keeping the interior moist. The shorter cook time also reduces the window for overcooking.
- Invest in a good thermometer: Visual cues like “clear juices” or “no pink in the center” are unreliable. An instant-read thermometer is the only way to guarantee perfectly cooked chicken every single time, and it costs less than $15.
Storage
Allow the baked chicken breast to cool completely to room temperature before storing. Place the chicken in an airtight container or wrap tightly in plastic wrap. Store in the refrigerator for up to 4 days. For best results, store the chicken whole rather than sliced, as cut pieces tend to dry out more quickly. If you plan to use the chicken in salads or sandwiches, you can slice it just before serving to maintain maximum moisture.
Freezing
Baked chicken breast freezes exceptionally well, making it ideal for meal prep. Once the chicken has cooled completely, wrap each breast individually in plastic wrap, then place all wrapped pieces in a freezer-safe zip-lock bag. Remove as much air as possible before sealing. Label the bag with the date and freeze for up to 3 months. For best quality, thaw overnight in the refrigerator rather than using a microwave, which can create uneven hot spots and dry out the meat.
Reheating
To reheat baked chicken breast without drying it out, preheat your oven to 325°F (165°C). Place the chicken in an oven-safe dish and add a tablespoon of chicken broth or water to the bottom of the dish. Cover tightly with aluminum foil and heat for 10–15 minutes until the internal temperature reaches 165°F (74°C). Alternatively, reheat slices in a skillet over medium-low heat with a splash of broth, covered, for 3–4 minutes. Avoid microwaving if possible, as it tends to make the rubbery.
Variations
- Spicy: Add ½ teaspoon of cayenne pepper and 1 teaspoon of chili powder to the spice rub. For extra heat, drizzle with your favorite hot sauce before serving or serve with a side of spicy mango salsa.
- Creamy: After baking, top each chicken breast with a slice of provolone or mozzarella cheese during the last 2 minutes of baking. Serve with a simple pan sauce made from the drippings, heavy cream, and Dijon mustard.
- Vegan: Replace the chicken with extra-firm tofu, pressed for 30 minutes to remove excess moisture. Slice into ¾-inch slabs, coat with the same spice mixture, and bake at 400°F (200°C) for 25–30 minutes, flipping halfway through.
- High-Protein: Serve the baked chicken breast over a bed of quinoa and black beans, topped with sliced avocado and a squeeze of lime. This combination delivers over 45 grams of protein per serving.
Substitutions
If you don’t have smoked paprika, regular sweet paprika works fine—just add a tiny pinch of cumin for a hint of smokiness. Olive oil can be swapped for avocado oil, which has an even higher smoke point. For a dairy-free herb butter variation, use vegan butter or ghee. If you’re out of fresh lemon juice, white wine vinegar or apple cider vinegar can provide a similar bright acidity. Dried Italian seasoning can replace the individual dried oregano and thyme if that’s what you have on hand.
Common Mistakes
The most common mistake when making baked chicken breast is overcooking it. Chicken breast is very lean and goes from perfectly juicy to dry and stringy in just a few minutes. Always use a thermometer and pull the chicken at 160°F (71°C). Other frequent errors include skipping the pounding step (which leads to unevenly cooked meat with a dry thin end and a thick undercooked center), not patting the chicken dry before seasoning (which prevents browning), and slicing the meat immediately after cooking instead of letting it rest (which causes all the juices to run out).
Serving Suggestions
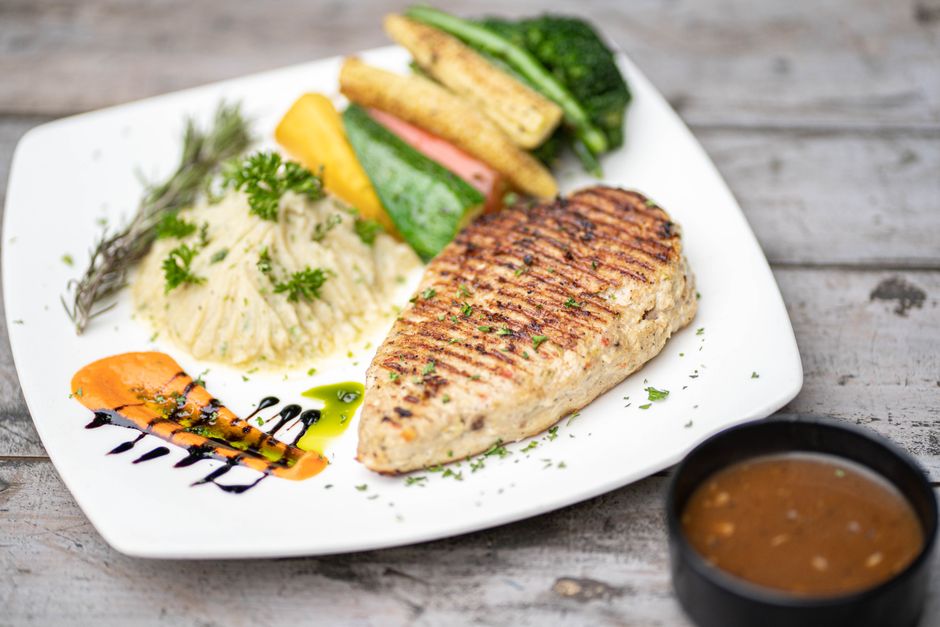
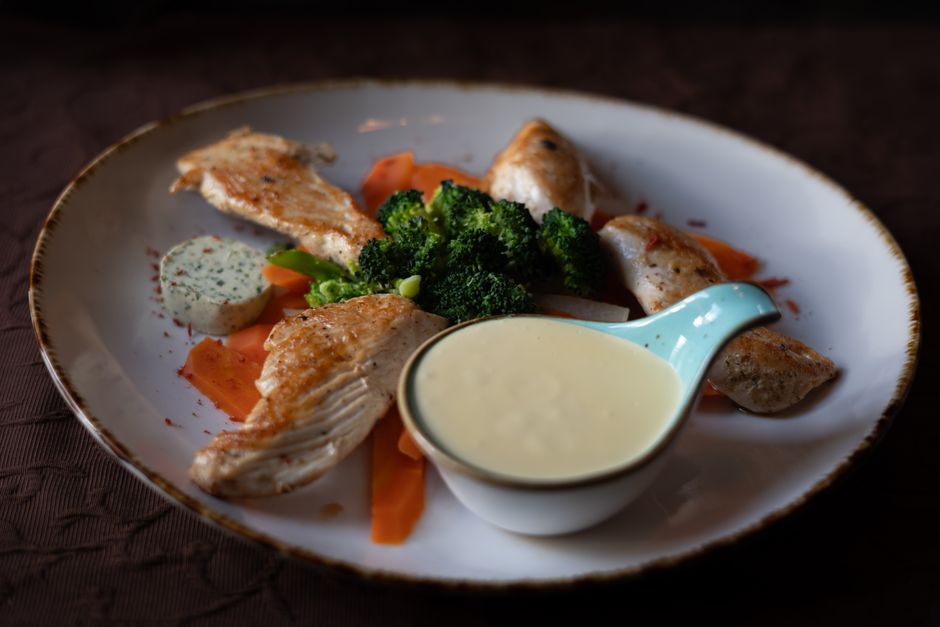
Easy baked chicken breast pairs beautifully with a wide variety of sides. For a classic comfort meal, serve alongside creamy mashed potatoes and steamed green beans. For a lighter option, try a fresh arugula salad with cherry tomatoes, shaved Parmesan, and a lemon vinaigrette. It also works wonderfully over cilantro-lime rice, alongside roasted sweet potatoes, or sliced on top of a Caesar salad. For a complete weeknight dinner, pair it with roasted broccoli and garlic bread for a meal the whole family will love.
Nutrition Facts
| Nutrient | Per Serving |
|---|---|
| Calories | 284 cal |
| Protein | 46 g |
| Carbohydrates | 2 g |
| Fat | 11 g |
Frequently Asked Questions
How do I keep baked chicken breast from drying out?
What temperature should baked chicken breast be?
Should I cover chicken breast with foil when baking?
Can I use frozen chicken breasts for this recipe?
How long does baked chicken breast last in the fridge?
🍽️ You Might Also Like


Culinary Glossary
Easy Baked Chicken Breast – Juicy & Perfect Every Time
Ingredients
- 4 boneless, skinless chicken breasts (about 6 oz each)
- 2 tablespoons extra-virgin olive oil
- 1 teaspoon kosher salt
- ½ teaspoon freshly ground black pepper
- 1 teaspoon smoked paprika
- 1 teaspoon garlic powder
- 1 teaspoon onion powder
- ½ teaspoon dried oregano
- ½ teaspoon dried thyme
- 1 tablespoon fresh lemon juice
- Fresh parsley for garnish (optional)
Instructions
- Preheat oven to 425°F (220°C). Line a rimmed baking sheet with parchment paper and place a wire rack on top.
- Let chicken sit at room temperature for 15–20 minutes. Pat completely dry with paper towels.
- Pound each breast to an even ¾-inch thickness between plastic wrap using a meat mallet.
- Coat chicken with olive oil. Mix salt, pepper, paprika, garlic powder, onion powder, oregano, and thyme. Rub spice mixture evenly over both sides.
- Place seasoned chicken on the wire rack with 1 inch between pieces. Squeeze lemon juice over the tops.
- Bake for 18–22 minutes until the internal temperature reaches 160°F (71°C) in the thickest part.
- Remove from oven, tent with foil, and rest for 5–8 minutes before slicing.
- Slice against the grain on a diagonal. Garnish with parsley and serve.

📅 Last Updated
Updated on 2026-06-16 to reflect the latest test-kitchen insights.
🔍 Testing Methodology
Every recipe is developed and tested at least three times in our home kitchen using standard US measuring cups and spoons.
📖 Recipe Source Notes
Inspired by traditional family methods and refined through professional culinary testing.
⚠️ Nutrition Disclaimer
Nutrition is estimated from an ingredient database. Actual values vary with brands and preparation.